 Blaine Siding
 Building New in Dakota Creek Means Building for the Water
Dakota Creek sits close enough to the water that every new home built here has to answer to it. Salt-laden air moves off Semiahmoo Bay and Drayton Harbor, wind-driven rain comes in sideways during winter storms, and the long, wet stretch from fall through spring keeps everything damp long enough for moss and mildew to take hold on anything that doesn't drain and dry properly. New-construction windows are one of the few building components that have to manage all three of those conditions at once, every day, for the life of the house.
"New-construction" windows are different from replacement windows in one important way: they install with a nailing fin directly into the framing, before the weather-resistive barrier and siding go on. That gives us full access to the rough opening, the sheathing, and the flashing details — which is exactly where a coastal build succeeds or fails. Get that sequence right during framing and the window performs for decades. Get it wrong, and you won't see the consequences until there's already a moisture problem behind the siding.
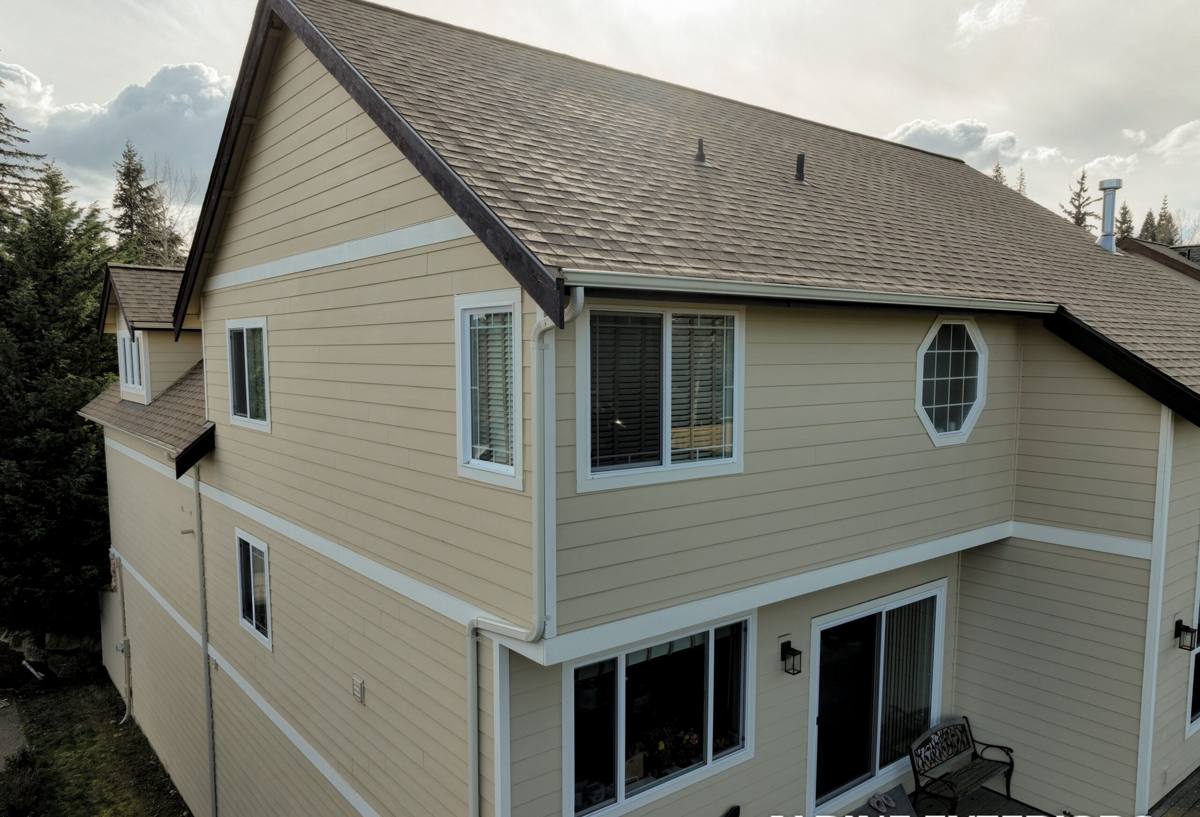
What Blaine's Climate Actually Does to a Window Opening
Homeowners in inland parts of Whatcom County can get away with installation shortcuts that simply don't hold up near the water. Three things make Dakota Creek and the greater Blaine area more demanding:
Salt Air
Airborne salt accelerates corrosion on exposed fasteners, hinges, and hardware, and it degrades some finishes faster than manufacturers' standard warranties account for. It doesn't ruin a window outright, but it rewards material choices and hardware finishes suited for coastal exposure and punishes anything installed for a drier, inland climate.
Driving Rain
Wind off the water doesn't just fall as rain — it pushes rain sideways and upward under trim and flanges that would stay dry in a calmer setting. A window opening that relies on caulk alone to keep water out will eventually leak. The opening needs a drainage path, not just a seal.
A Long Moss Season
Western Whatcom County stays wet for much of the year, and anywhere water is allowed to sit — a sill without slope, a flat trim board, a flashing lap installed backward — becomes a place for moss, algae, and eventually rot to establish. New-construction detailing is your one chance to build in the slope and drainage that keeps those areas dry between storms.
Getting the Flashing and Water Management Sequence Right
Most window failures on new builds aren't glass or frame failures — they're sequencing failures. Water management around a new-construction window depends on layering materials in the correct order, shingle-style, so that any water that gets past the outer layer is directed back out rather than trapped behind the siding.
On a correctly installed opening, that means:
- A sloped sill pan flashing installed first, so any water that reaches the sill drains back outward instead of pooling against the framing
- Weather-resistive barrier integrated so the lower layer laps over the sill pan and the upper layer laps over the head flashing — never the reverse
- Window nailing fin fastened per the manufacturer's schedule, not just "enough to hold it"
- Head flashing installed above the window and lapped correctly under the barrier above it
- Sealant used only where it's supposed to stop water, not as a substitute for proper flashing laps or as a way to seal off drainage paths
That last point matters more on a marine-climate build than almost anywhere else. A bead of sealant across the bottom of a nailing fin looks tidy, but it traps any water that gets behind the siding instead of letting it drain out. We follow manufacturer flashing instructions and standard water-managed wall assembly practice on every opening, not because it's the fast way, but because it's the only way that holds up through a Whatcom County winter.
Choosing a Frame Material for a Coastal Whatcom County Build
Frame material affects how a window handles salt air, temperature swings, and long-term maintenance. There's no single "correct" choice for every home — it depends on budget, design, and how much upkeep you want to take on — but the trade-offs are worth understanding before you commit.
| Frame Material | Coastal Durability | Maintenance | Typical Cost |
|---|---|---|---|
| Vinyl | Good — won't corrode or rust; UV-stable finishes hold up well near the water | Low — occasional cleaning | Lower |
| Fiberglass | Very good — dimensionally stable, resists the expansion/contraction that stresses seals | Low | Mid to higher |
| Wood-clad | Fair to good depending on cladding and detailing — interior wood needs protection from condensation | Higher — finish and seams need periodic attention | Higher |
| Aluminum | Requires marine-grade finishes and hardware to resist salt corrosion long-term | Moderate | Varies |
Hardware finish matters as much as frame material near the water. Ask what hardware and fastener finishes are rated for coastal or marine exposure before you assume a standard package will hold up the same way it would twenty miles inland.
Energy Performance in a Marine Climate
Western Washington's marine climate zone calls for windows that hold heat in during our long, mild-but-damp winters without overheating rooms during the shorter stretches of summer sun. Washington's energy code sets minimum performance requirements for new construction glazing, and homes in this climate generally do best with U-factors in the 0.28–0.30 range or better, paired with a glazing package suited to a lot of overcast, diffuse light rather than intense direct sun.
Low-E coatings, gas fill, and warm-edge spacers all contribute to that performance, and the right combination depends on orientation, how much glass the design calls for, and whether particular elevations face into the prevailing wind and rain off the water. This is a conversation worth having room by room, not just window by window.
Our New-Construction Window Installation Process
On a new build, window installation is a coordination job as much as a technical one. Framing has to be square and correctly sized to the rough opening call-outs, the barrier and flashing sequence has to happen in the right order relative to the siding crew, and inspections often need to happen at specific points before the wall gets closed up.
- Rough opening check — verify size, square, and level before any window arrives on site
- Sill pan and flashing install — sloped sill pan and flashing tape applied per manufacturer detailing
- Window set and fasten — shimmed plumb, level, and square, then fastened to the manufacturer's schedule
- Head flashing and barrier lap — integrated with the weather-resistive barrier above the opening
- Operation check — every sash and lock tested before the opening is closed in behind siding
- Handoff to siding — trim and drainage details coordinated so water has a clear path down and out
We coordinate directly with builders and general contractors on timing, since windows on a new build have to go in at a specific point in the framing schedule — not too early, not after the barrier is already up.
A Practical New-Construction Window Checklist
Whether we're doing the install or you're comparing bids from another crew, these are the things worth confirming before an opening gets closed up behind siding:
- Sill pan flashing is sloped to drain outward, not flat or pitched inward
- Flashing laps follow shingle order — lower layers under, upper layers over
- Fastening follows the manufacturer's schedule for wind load, not a generic pattern
- Sealant is used only where specified, and drainage paths aren't sealed shut
- Frame and hardware finishes are rated for coastal or marine exposure
- U-factor and SHGC values match what the design and energy code call for
- Every sash and lock is operated and checked before the wall is closed in
- Photos or notes are kept of flashing details before they're covered — useful for any future work
Why a Crew That Already Works Dakota Creek Matters
New-construction window work rewards local experience more than most trades. A crew that's already worked homes in Dakota Creek and around Blaine knows which elevations take the worst of the wind off the water, how far salt air travels inland before hardware choices need to change, and what Whatcom County and City of Blaine inspectors expect to see at flashing and rough-in checks. That's not something you get from a manufacturer's install manual alone — it comes from doing this work, in this specific place, repeatedly.
It also means fewer surprises for your builder. We know how to sequence with framing, siding, and inspection schedules on local jobs because we've done it before on homes facing the same weather yours will.
If you're building new in Dakota Creek and want a straightforward look at what correct window installation involves for your specific plans and elevations, we're happy to walk through it with you. Reach out for a free, no-pressure estimate using the form below.